How to Make a Photo Strip Online Free — The Complete Beginner's Guide (2026)
Last updated: May 28, 2026 — 7 min read
How to Make a Photo Strip Online in 60 Seconds
To make a photo strip online for free: open a browser photobooth, pick a layout, take or upload four photos, apply one filter, and download. No app, no signup. That's the whole process — and this beginner's guide breaks down every step so your first photo strip looks intentional instead of accidental.
The classic format is the 4-cut photo strip — four vertical frames popularized by the Korean life4cuts trend. It's the gold standard, but it's far from your only option.
What Is a Photo Strip?
A photo strip is a sequence of photos arranged in a single printable column or grid — the format you've seen come out of mall photobooths for decades. Today you make them digitally: the online photobooth captures the frames, arranges them in a template, and exports a high-resolution image you can print or post. (The photobooth itself dates to a 1925 New York invention — the format has barely changed because it just works.)
Step 1: Choose Your Layout
Layout sets the whole vibe. PolaroidCam offers 10+ on the layout page:
- 4-cut strip — the classic vertical strip; best for couples, friends, and favors. Open it here.
- Single polaroid — one framed photo with a caption. Use the polaroid maker.
- Vintage filmstrip — horizontal frames with film-sprocket borders. The aesthetic strip default.
- 2×2 grid — fits more people per shot.
- Scrapbook collage — tilted photos with stickers, great for playful posts.
Step 2: Add Your Photos
You have two options, and both work on any phone or desktop:
- Capture live — use the built-in countdown timer and pose for each frame.
- Upload — drop in photos from your camera roll.
Either way, photos are processed locally in your browser — they're never uploaded to a server or AI dataset, so your strip stays 100% private.
Step 3: Apply One Filter (Not Four)
This is the single most important rule for a clean strip: use one filter for the entire strip. Mixing a warm frame with a B&W frame and an untouched frame is the #1 amateur tell. Open the Colors tab and pick one:
- Vintage — warm, nostalgic, film-like. The most popular choice.
- Cinematic — moody, high-contrast, editorial.
- B&W — timeless and flattering.
- Y2K — saturated early-2000s disposable-camera look.
For a full breakdown of each look, see our aesthetic camera filters guide.
Step 4: Customize the Frame
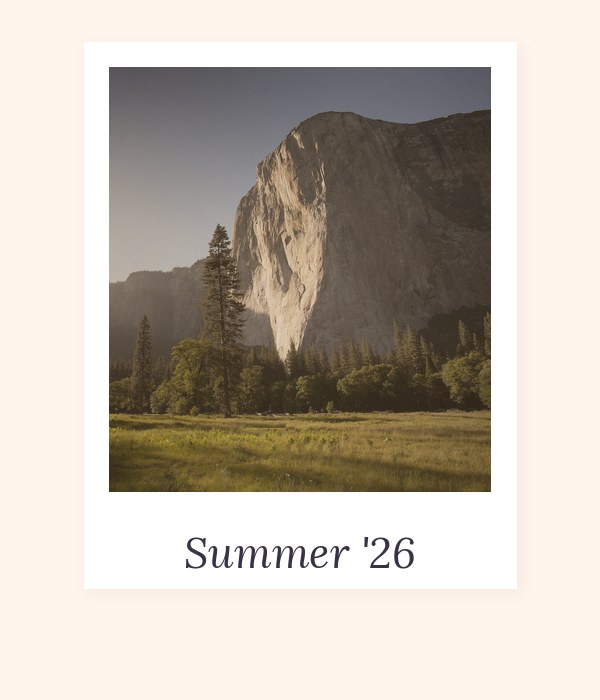
Add a caption (event name, date, or a couple's names), change the frame color, and drop in stickers if you want a playful feel. A caption like "Summer '26" instantly makes a strip feel like a keepsake rather than a screenshot.
Step 5: Download and Print
Click export and your strip saves as a full-resolution PNG. To print it well:
- Export as PNG, not JPG — it keeps the frame edges sharp.
- Classic strip size is 2×6 inches.
- Print at 300 DPI on glossy photo paper (most home printers default to 150 — check settings).
- Local photo shops and kiosks print 2×6 strips cheaply if you don't have a printer.
5 Beginner Mistakes to Avoid
- Mixing filters across frames — pick one and stick with it.
- Bad lighting — face a window or soft light; avoid harsh overhead bulbs and direct flash.
- Same pose four times — vary it: smile, laugh, look away, surprise. See our selfie guide.
- Cluttered background — a plain or intentional backdrop beats a messy room.
- Exporting too small — always download full resolution if you plan to print.
What to Use Your Photo Strip For
- Couples — date-night and long-distance keepsakes. Ideas in our couple photo strip guide.
- Parties — birthday and event favors. See birthday photo booth ideas.
- Weddings — printed guest favors. Full setup in photo strip wedding favors.
- K-pop fans — photocard-style strips, covered in our photocard guide.
Free vs. Paid Photo Strip Makers
Most "free" tools watermark your strip, require a signup, or cap downloads. A genuinely free maker has no watermark, no signup, processes locally, and exports at full resolution. For a side-by-side comparison of seven tools, read our best free photo strip maker comparison.
Frequently Asked Questions
How do I make a photo strip online for free?
Open the photo strip maker, choose a layout, take or upload four photos, apply one filter, and download. It's free, with no app and no signup.
What size is a classic photo strip?
The classic photobooth strip is 2×6 inches. Export as PNG and print at 300 DPI for the sharpest result.
Can I make a photo strip without downloading an app?
Yes. Browser-based booths work on any phone or desktop — no install, no storage used.
Are my photos private?
With PolaroidCam, yes — photos are processed locally in your browser and never uploaded to a server.
What's the most popular photo strip layout?
The 4-cut vertical strip (life4cuts style). It's print-friendly, wallet-sized, and the standard for keepsakes and favors.
Key Takeaways
- Making a photo strip online is five steps: layout, photos, one filter, customize, download.
- The 4-cut strip is the classic, but 10+ layouts are available.
- One filter across the whole strip is the most important rule.
- Export as PNG at full resolution; print 2×6 inches at 300 DPI.
- A truly free maker has no watermark, no signup, and processes photos locally.
Make your first photo strip now
Free online photo strip maker. 10+ layouts, live filters, full-resolution download. No app, no signup, no watermark.
Open Photo Strip Maker